Candy Covered Pretzels
PinterestYield: about 66 pieces
Time: 15 minutes
Buttery pretzel squares (regular pretzels would probably work, too)
Milk chocolate hugged by white creme Hershey's Kisses
M&Ms (preferably holiday colored)
Preheat oven to 300°. Line cookie sheet with parchment paper. Place pretzels on parchment paper in a single layer. Place an unwrapped Kiss in the center of each pretzel. Bake in oven for three minutes.

While still warm, place one M&M on the center of each Kiss, "M" side down.

Put in freezer for 20 minutes to cool & set.
Crockpot Candied Pecans
Pinterest: The Gingerbread BlogYield: about 5 cups
Time: 3 hours 35 minutes
½ cup (1 stick) butter
16 oz pecan halves
½ cup powdered sugar
Spice Mix
1 ½ tsp cinnamon
¼ tsp ground cloves
¼ tsp ground ginger
Pinch of salt
Preheat crockpot on high for 15 minutes. Melt butter in crockpot. Add pecans and stir to coat. Stir in powdered sugar & coat pecans. Cover and cook on high for 15 minutes. Uncover & turn to low, cooking for about 3 hours. Stir occasionally, until crisp glaze forms.

Toss pecans to coat in spice mixture. Spread on parchment paper lined cookie sheet and cool.

Sugar Cookies
Alton BrownYield: about 48 medium cookies.
Time: 2 hours 25 minutes
Flour Mixture
3 cups flour
¾ tsp baking powder
¼ tsp salt
1 cup (2 sticks) butter, softened
1 cup sugar
1 egg, beaten
1 tbsp milk
Powdered sugar, for rolling
In a stand mixer using the paddle attachment, cream butter & sugar. Add egg & milk. Slowly add flour mixture until dough pulls away from the bowl. If dough resists pulling away from bowl, turn mixer up to medium.

Form into two disks & cover in plastic wrap. Refrigerate for 2 hours.
Preheat oven to 375°. Line cookie sheet with parchment paper. Roll out dough with powdered sugar to about ¼ inch thick. Cut with desired cookie cutter shape and place on parchment paper.


Bake 7-9 minutes, rotating cookie sheet halfway through. Watch carefully to avoid overbaking or burning.

Let cool on sheet 10 minutes before transferring to a cooling rack. If decorating with Edible Glitter (follows), place face down on glitter and tap lightly on the back, while cookie is still warm. Transfer to cooling rack.

Cool completely before attempting to frost. (See below for decorating tips.)


Edible Glitter
PinterestYield: varies
Time: 10 minutes
Sugar
Food coloring of choice
Preheat oven to just under 200°. Line a baking sheet with parchment paper. Put desired amount of sugar in a container with a lid.

Add desired amount of food coloring.

Put lid on container & shake thoroughly.

When satisfied with color, spread out on parchment paper.


Place in oven. After 5 minutes, wiggle baking sheet to sift sugar around. Check very frequently to ensure sugar does not melt. When sugar begins to spark, remove the baking sheet from the oven.

Let cool. Store or use as desired.
Royal Icing
Pinterest: Beth Gambee (Little Delights Cakes)Yield: 1 batch
Time: 6 minutes
3 large egg whites
1 ¾ cup powdered sugar
With a whisk attachment on your stand mixer, combine egg whites with powdered sugar on low speed, scraping down sides of bowl as necessary.

Once fully combined, turn mixer to highest setting and mix for approximately five minutes, until whites hold a peak.


Color as desired (recommend using gel color to prevent thinning the icing too much).


Chocolate Covered Strawberry Hearts
Facebook--Price Less Foods (owned by the Houchens Industry)Yield: varies
Time: 1-2 hours
1 container of strawberries
1 bag worth of chocolate chips
1/4 tbsp butter
1/2 tbsp vegetable oil
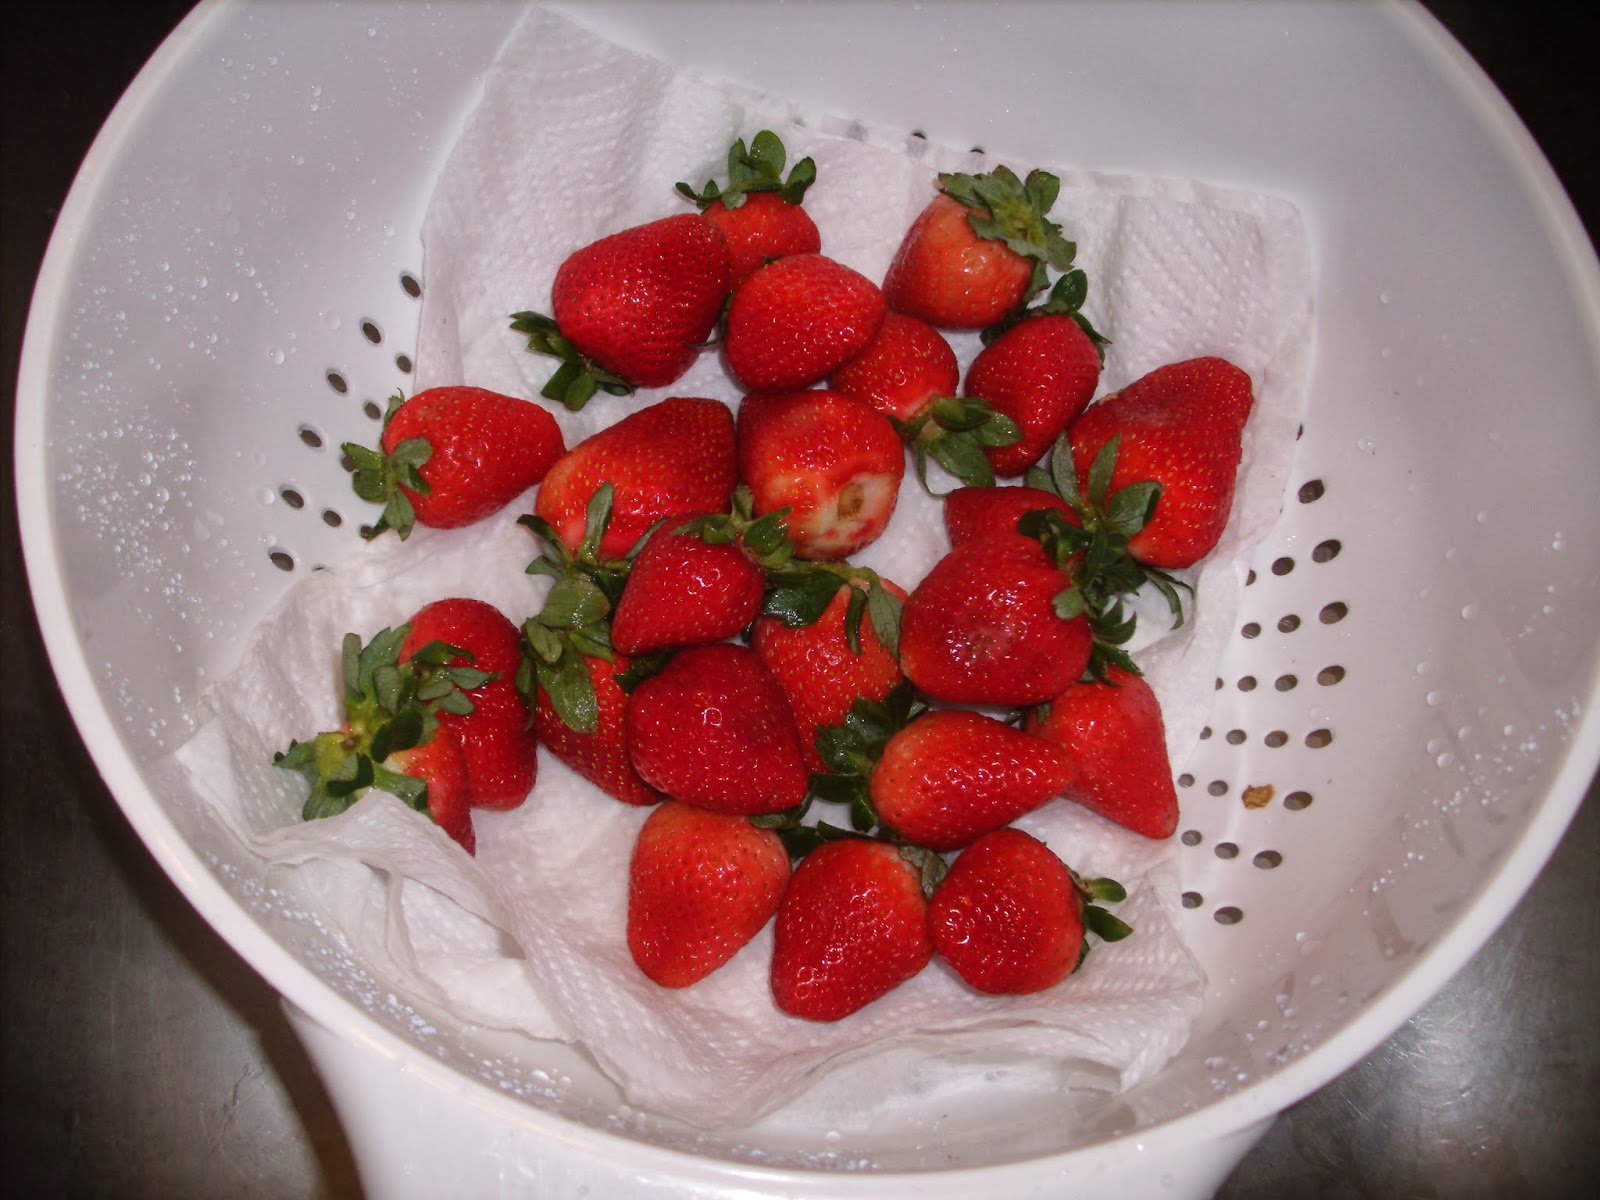
Wash and thoroughly dry strawberries.
Line a cookie sheet with parchment paper. Cut off green tops of strawberries and halve. Lay halves cut side down and place together to form a heart. Trim as necessary to achieve heart shape. Stick a tooth pick through the side, connecting the two halves to form the heart.


In a double broiler, melt together butter and chocolate chips, stirring occasionally.

Once melted, add vegetable oil to achieve a shine. Take strawberries and spoon a layer of chocolate onto the back of the strawberries.

Let set, about half an hour or longer, as necessary. If need be, stick in refrigerator or freezer to accelerate this process. Once set, remove toothpick and turn over. Spoon chocolate over the top and let set again. If you choose to sprinkle with edible glitter, do so before leaving to set. After the chocolate is all set and if you have any leftover chocolate, feel free to add food coloring and use a fork to drizzle it over the strawberries for decoration.

More Info
Candy Covered Pretzels
This is really as simple as it sounds. It just takes a few minutes and a touch of patience. And just look at that picture! At how pretty they came out! These are super adorable, if you ask me. And they were very yummy, too (I ate a couple...I had to try them out!).Crockpot Candied Pecans
This is really quite a simple recipe, but honestly, it may take longer than that 3 hours to get your crispy glaze that you're looking for. And while I love these, and think they make a great gift, they'd probably be better suited for the Fall season, or for Christmas (really, I guess I made these since it is still winter, and I think they're well suited to both the Fall and Winter seasons).Sugar Cookies
Like it says above, watch carefully! I actually burned my first batch. Mostly because I'd accidentally rolled them too thin. What can I say? I tend to do that a lot. Mostly because I like things thin. Like my pie dough, for instance. Also, if you're having problems getting your cookie dough to pull away from the bowl even after you've added all the flour, just crank it up to about medium. After a minute, it'll pull right away and hug the paddle. No worries about that, though. The dough is soft and will fall off of it with a light poke.Look forward to seeing this recipe on a few more blogs this year. They were pretty yummy, and will probably be used for Saint Patrick's Day, definitely for Easter, and probably for a few other major holidays, too. I guess we'll see.
To decorate the cookies, as demonstrated in the pictures above, put a base coat on your cookies. Using two other colors, make lines (either vertical or radiating outwards from the center), then use a toothpick and drag it through the icing, barely touching the cookie (either back and forth horizontally, or spiraling outwards from the center).
For more tips on decorating, visit this page.
Edible Glitter
This is seriously one of the most simplest things in the world! Why would you ever bother buying sparkly sugar again, when you can make it in ten minutes or less! Never again, I tell you!Anyway, when the red glitter came out of the oven (you don't wanna know how much food coloring I used on it), it had formed into clumps, so I just broke it up with my fingers, and it worked fine. I only used three drops of food coloring for my pink sugar, though, and had no problems with it whatsoever.
Royal Icing
The original recipe I attempted for this was horrible. Using this one was such a success, that the contrast between the two ending textures was mind blowing for me. This icing came out light and fluffy...kinda like marshmallow creme, only not sticky. And the taste was 100% better than the first recipe I tried. Anyway, in the pictures above for the royal icing...the last picture in that section to be specific, you'll see that I have thinned icing in bottle, upside down in a cup. They're squeeze bottles, Mainstay brand, from Wal-Mart, and they were only $0.97 a piece. Very handy to have. However, if you have piping bags, you may wish to use those instead, just to save yourself a bit of money.Chocolate Covered Strawberry Hearts
I popped my strawberries into the freezer to set, about 20 minutes or so each time. You will notice some leakage from the strawberries when you put them in the freezer, but don't let it concern you. Also, you may need more than a bag's worth of chocolate chips (I only had a total of 1 ¼ of chocolate chips...I was using what I had leftover from a Chocolate Chip Cookie Cheesecake [you'll be seeing that recipe in the near future]). Anyway, it was far from enough. Maybe a bag would be enough (since a bag is typically about two cups), but you'll have to judge that for yourself. Also, I was using a small container of strawberries, not a large one.Overall Meal
Yeah, yeah, I know...not a meal! MEH, sue me.Anyway, I made these treats for my brothers, and whomever they wished to share them with. I also made this for one's girlfriend (he's the only one with a girlfriend at the moment...they're teenagers, it changes day-to-day!):

How did I make it? Very simply. I took the zipper off a ripped pair of jeans (they were clean!), I bought a cheap $1 sewing kit, and I took a charm off an old necklace I had. A few stitches, a couple of snips to make holes for the chain to go through, and BOOM! Instant gift! Check out this pin on Pinterest for more info (when you go to the website it came from, it tells you "Source Unknown," so you pretty much have to wing it from the picture).
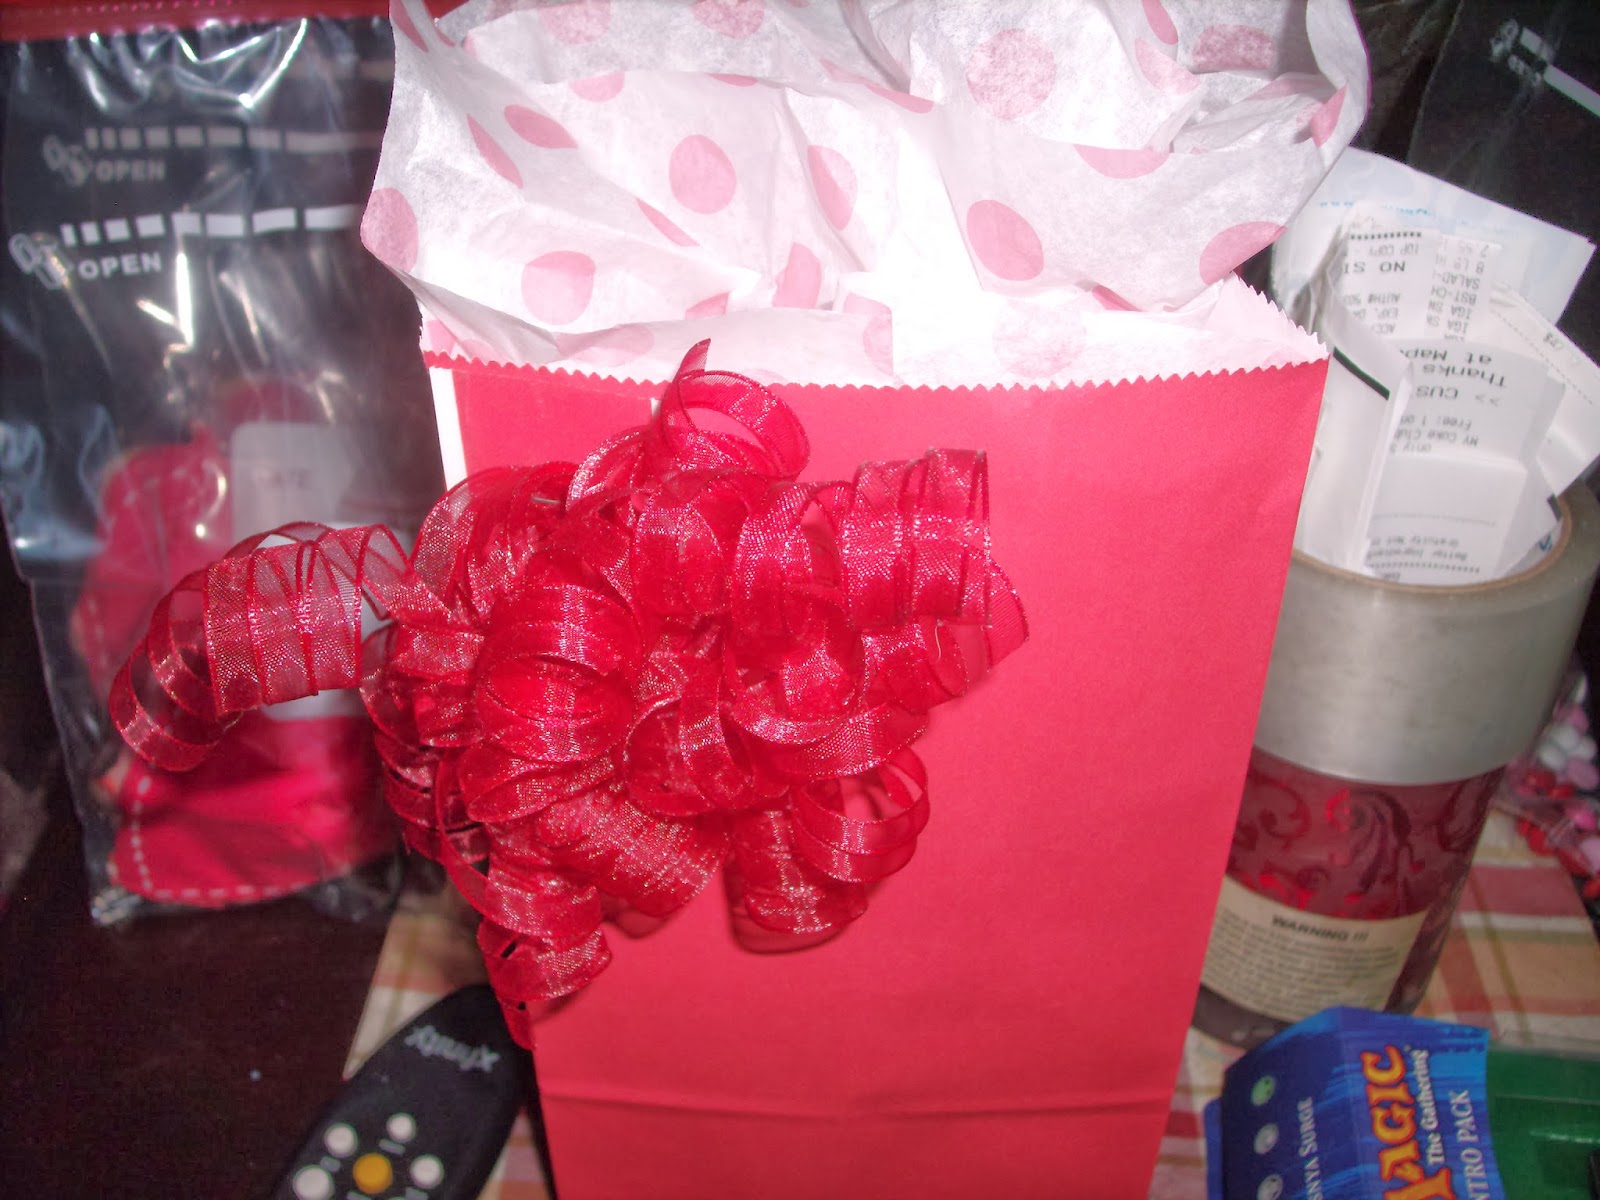
Okay, so that paper bag there? It was next to the Valentine's Day cards. 3 for $1. I did buy three, and used the other two for the younger brothers' treats. The tissue paper was $1.47, and three sheets were pink polka dotted, and the other three were plain white. The ribbon was $1.57.

This is the "bag" holding the older brother's (and his girlfriend's) treats. I took the remaining tissue paper, kinda crisscrossed it, then put the treats in the center and pulled the paper up around it. I squeezed the paper just above the treats to make it hold shut while I tied it with "Hot Pink" tulle ribbon (for a 4 yd spool, it was $2.57...I know, expensive...but I couldn't resist it. It was perfect for what I wanted to do).


This is the bag I put my mother's pecans in. 10 of these for only 97¢! They are cute, and you can write a name on the center of the bag (like I did~). They do come with twist ties so you can seal them up. I found them in the Valentine's Day aisle (one of them, anyway...our Wal-Mart has three, including the one with the cards, wrapping paper, gift bags and all that...and they're all in different places, too).

So that's it! Good luck making these, and I hope you and yours enjoy them. Have a happy Valentine's Day!
UPDATED 02/13/14:
- Added links under recipe titles to credited source
Questions? Leave a comment!
No comments:
Post a Comment